Thursday, December 31, 2009

Austin 63-Way Chili: Part Chili, Part Mole, Entirely Delicious

It's been chilly here in Yankee Land. JG and I decided to combat the weather (and our raging colds) with our very own Austin 63-Way Chili. It's a hybrid of the Cincinnati chili favored by his Missouri relatives [where the number refers to how you order it and we usually made it 3-Way, with cheese, over pasta] and Mexican mole. It's a smokey, earthy, wholesome, stick-to-your-ribs treat that gets even better as it ages.

I get positively giddy about leftovers.
Why 63? Well, I don't remember exactly. We came up with a list of toppings and foundations [which has since been expanded] and JG somehow came up with variations totaling 63 to the 3rd power... but that was too long for a name, obviously. We also opt for condiment bowls so everyone tops their own; numbers other than 63 have no meaning in this context so don't ask me what 52-way is -- it's just its name.
If you're leery about chili over pasta, think of it as really thick spaghetti sauce. If you're leery about chocolate powder and spices in your spaghetti sauce, remember this is not actually spaghetti sauce; it's a chili-mole hybrid.

See? Nothing to be afraid of here.

Recipe: Austin 63-Way Chili
Part Chili, Part Mole, Entirely Delicious
Can you tell I just use a couple measuring spoons when I'm making up a recipe? I highly recommend combining all the spices in a small bowl and the wet ingredients in a larger one before you begin browning the meat or soy substitute. You can prep the condiments while the chili is cooking.
I've done this in the pressure cooker, reducing the broth to 1/2 cup and cooking at pressure for 12 minutes. I think you can do this in a slow cooker, but, again, you'd probably need to reduce the broth to ~1/2 cup since the lid stays on and less evaporates off.


Serves 6-8

2 tablespoons olive oil
1 1/2 lbs. ground turkey (or other ground meat-type product)
2 onions, chopped

3 cloves of garlic, minced

3 tablespoons Ancho chile powder*
2 teaspoons dried oregano (preferably Mexican, 2 tablespoons if fresh)
1 tablespoon unsweetened cocoa powder (preferably Dutch-processed)
2 teaspoons table salt
1 1/2 teaspoons ground cinnamon
1 1/2 teaspoons masa harina** (or fine ground cornmeal)
1/2 teaspoon ground cumin
1/2 teaspoon cayenne pepper powder (optional, you can also add hot sauce to taste)
1/2 teaspoon ground allspice
1/2 teaspoon ground black pepper

2 cups chicken broth (or vegetable)
1 30 oz can diced or whole tomatoes, au jus
2 tablespoons apple cider vinegar
1 tablespoon peanut butter (crunchy or creamy) or tahini
1 tablespoon dark brown sugar

Serving Options:
1 lb. cooked whole-wheat pasta
2 lbs. oven-roasted yucca or potatoes
8 oz shredded cheese (we mostly do cotija or crumbled goat cheese, but cheddar works, too)
16 oz can black beans, drained, rinsed and warmed
1/2 cup chopped fresh cilantro
1/2 white onion, minced
hot pepper sauce, like Cholula or Tabasco

Over medium, heat oil, add onions and meat (or faux meat), and cook, stirring frequently, until onions are soft and meat is browned, ~6-7 minutes. Add garlic and stir until fragrant, ~1 minute. Add spices, stirring until the spices are fragrant and toasted, ~30 seconds. Stir in remaining ingredients, scraping the pan bottom to loosen any stuck browned bits.

Increase heat to high. As soon as liquid boils, reduce heat to medium-low and simmer, stirring occasionally, until chili is a deep reddish-brown and somewhat thickened, ~1 hour. Adjust seasonings to taste.

Serve over cooked pasta or roasted tubers. Top as desired.


*Ancho chile is dried poblano. It has a much smokier flavor than the New Mexican chile powder made from dried green chiles. It's worth seeking out and since McCormick's markets it, I don't think it's too hard to find.

**Masa harina is ground corn flour treated with mineral lime, typically used for making corn tortillas. Tortillas are pureed into moles to give them body and I used the masa harina here in the same vein. Alternatively, you may omit the thickener entirely and just cook the chili
a little longer.


Wednesday, December 23, 2009

Roasted Kabocha, an easy side dish

Kabocha is a Japanese pumpkin [hard winter squash] with a nutty flavor and natural sweetness. It's like a more intense butternut squash with a texture almost as dense as a sweet potato. I recently saw them in the grocery store labeled "buttercup squash" and if you find them, you should definitely take a couple home. You can dice it and roast it with the skin on, and it can cook in the oven [or toaster oven] while any big piece of meat (roast, whole bird, etc] is resting before carving... it's a great side dish for a holiday meal with very little effort.
If I'm only cooking for two, [and I usually am] I'll cook just a half at a time as a super simple side dish in my toaster oven while I'm working on the stove. I'm highlighting it as a holiday side, but goes with pasta or rice dishes just as well.

Recipe: Roasted Kabocha, "Buttercup Squash"
You can add a sprinkle of whatever spice might tie it in to your main dish, maybe a little thyme or fennel seeds or crushed garlic or red pepper flakes... but it's pretty great with simple salt and pepper.
If you're doing this while a roast or bird is resting, it's better to prep the squash while your meat is still cooking so you can slide it right into the oven after the meat comes out... it won't hurt it if starts cooking before the oven's up to temp.


serves 4

1 kabocha or buttercup squash
cooking spray
salt
pepper

Preheat [or increase] oven to 425F.

Using a sturdy knife, cut the squash half, pole to pole, and remove seeds and fibers. Halve each half and remove the stem end. Dice into ~1/4-1/2" cubes.

Cover a shallow roasting or jelly-roll (half-sheet) pan with aluminum foil and spray with cooking spray. Transfer squash cubes to the pan, spray again with cooking spray, and sprinkle liberally with salt and pepper.

Roast until deep brown spots appear ~20 minutes, stirring once halfway through, if you're not busy setting the table.


Friday, December 18, 2009

I Spy

Here's a little game:


What do you see in this picture? It's not the most aesthetic picture I've ever taken, but I've been staring at it for a while and there're a _lot_ of things going on here.

Wednesday, December 16, 2009

La Vista

I snuck back to Texas for a week just as the snow started in Yankee Land. My brother works on a cattle ranch [remember the Beef Cake?] and we spent a little time out there. I really loved this picture of a hornet's nest on a mesquite branch... "Don't Mess with Texas," indeed.

[FYI: Mesquite is not native to Texas but was brought with the Spaniards, probably as seeds in the stomachs of their cows. Those thorns are thick and sharp enough to puncture a car tire.]

Wednesday, December 9, 2009

Grandpa Jack's Toffee... my way.

I was looking to make a non-cookie treat and a trip through my grandmother's old recipe box yielded a card in my grandfather's handwriting for English Toffee. [As far as I can tell, it's an American creation, where "English" means slathered with chocolate.] My grandmother made a lot of sweets, but my grandfather always made the candy, using a scientific thermometer permanently borrowed from his chemistry lab to monitor the temperature of the sugar.
I grew up hearing stories about Grandpa and his chemistry candy thermometer, but I've since learned you don't actually need to take the sugar's temperature if you're making a simple caramel or toffee. It'll be at the hard crack stage once it starts taking color, so you can just pull it off the stove when it's a little lighter than you want the final candy to be and let it sit in the hot pot until it reaches that caramel brown color. It's easy, but it rarely fails to impress.

Another thing about toffee specifically is that the butter will separate out a bit, which then, in English toffee gets combined with the chocolate to make a rich top coating. I was able to reduce the butter from 16 tablespoons to 6 [browning 2 of them for more flavor] without a problem. I mean, it's still a candy made from sugar and butter, but reducing the fat never hurts.
I also have a trick to keep the chocolate from getting too soft in a warm room, but for that, you'll have to follow the recipe...

Recipe: Jack's Granddaughter's English Toffee
Grandpa's recipe calls for pecans, though it seems walnuts would be more "English".

6 Tbs butter [divided use]
1 cup sugar
pinch salt
1 Tbs amaretto
3 oz dark chocolate, chopped
1/2 cup pecans, toasted and chopped

Place a cookie sheet into the oven and set to 400F.* Oil an 8x8 metal pan close to the stove. In a heavy bottom pot, brown 2 tablespoons of butter over medium high heat. Once the butter solids turn the color of almond skins, add remaining butter, sugar, and salt, and stir until the butter melts and sugar liquifies. Boil, stirring occasionally, until mixture is a rich caramel color, just a shade lighter than desired. Stir in amaretto [mixture will sputter] and pour into the prepared pan. Wait 3 minutes for the toffee to set, then sprinkle with chocolate. Wait another ~2 minutes for the chocolate to mostly melt, then spread with an offset spatula or knife. Remove cookie sheet from the oven and place over the toffee pan. Let it sit for 3 minutes, [turn off the oven meanwhile] then remove. Sprinkle with toasted nuts and allow to cool until chocolate is firm to the touch, ~30-45 minutes. Turn toffee out of the pan and cut with a sharp knife or break into pieces. Store in an airtight container.


* The pan over the top will heat the chocolate further and help retemper it... without melting your toffee. [FYI: if you're making those cookies with the Hershey's Kiss in the middle, it's also best to pop those bad boys back in the oven for a couple minutes after adding the kisses; they'll actually re-solidify faster and harder.]

Sunday, December 6, 2009

Yep.


It did that thing they said it would do.

Thursday, December 3, 2009

An Intrepid Window Screen

Our downstairs neighbor replaced some cracked glass in the hallway window, but since it starts getting dark around 4 here in Yankee Land and he has a day job, working on it meant having a giant screen-less hole when all the interior lights were on. I was sure we were going to have a plague of moths, but the next morning I discovered that a temporary window screen had neatly installed herself from corner to corner.
You might need to click on the picture to get a clearer picture.

Tuesday, December 1, 2009

Sorghum

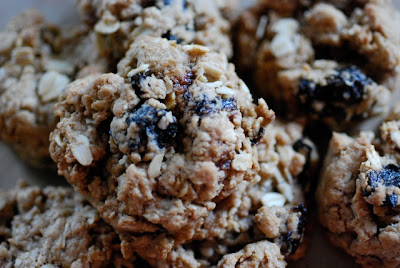
Sorghum syrup isn't much used outside the breadbasket states, but it's pretty popular where my parents are from in Iowa, where sorghum [a grain species that includes milo and millet] is mostly grown as livestock feed. Its taste is a little spicier and sweeter than blackstrap molasses and has a much richer flavor than dark corn syrup, though either could be used in this recipe. I've never found anyone who sold sorghum outside the Midwest, but it is available online.I grew up drizzling the syrup over my pumpkin pie -- no matter how good your pumpkin pie is, it's always improved by a little sorghum. My dad's favorite way to consume it is in the form of oatmeal-sorghum cookies, so I recently created a lower-fat, whole-grain version. Both he and my mom said they were the best they'd ever had.
Of course, I'm their only daughter, so I don't imagine they'd ever turn down my cookies.

Recipe: Oatmeal Sorghum Cookies
You can use all purpose flour in lieu of oat flour, but cake flour would be a better substitute.

1 cup white whole wheat flour
1 cup oat flour
1 tsp baking powder
1/2 tsp baking soda
1/2 tsp salt

1/2 cup sugar
1/4 cup brown sugar
1/2 cup sorghum
4 T brown butter
2 T amaretto
1 tsp vanilla
1 egg, lightly beaten

1 1/2 cups rolled oats

Preheat oven to 375F. Combine flours, leaveners, and salt in a medium bowl and set aside. In a mixing bowl, combine sugars, sorghum and butter and beat until combined on medium-low speed. Add vanilla and amaretto and beat on medium speed until incorporated, then add egg and repeat. Add flour mixture and beat on low speed until mostly combined. Scrape down bowl, then add oatmeal and beat until dough is evenly moist.

Drop from teaspoon onto a parchment-lined baking sheet (or use a #40 scoop). Bake 12-14 minutes or until the tops look dry and the cracks look moist. They will fall as they cool.


Monday, November 23, 2009

Gluten-Free Cashew Gingersnaps


This recipe is basically a tuile batter: an egg-white based cookie that uses a little flour or ground nuts for structure. They harden as they cool, so they're sometimes spread thin, then rolled up like a cigar fresh out of the oven and filled with a ganache after they cool, or sometimes they're made into squiggly designs and stuck vertically in a mousse or ice cream, restaurant-style.

I'm not much of an artist, but I can write fairly well with tuile batter.


Recipe: Gluten-Free Cashew Gingersnaps
There's not a whole lot of ginger in this recipe, but there's no flour to mute it so the flavor is pretty pronounced. The cashews offer a neutral buttery flavor that goes well with the ginger, but almonds would work well, too. The batter can be stored in the fridge for a few days, but after baking they'll soften to the point of chewiness after a few days.

3/4 cup sugar
1/2 cup cashews
3 egg whites
1/4 tsp cider vinegar
1/4 tsp ginger
1/8 tsp cardamom
1/8 tsp salt

Sesame seeds, to garnish

Preheat oven to 350F and line two baking sheets with parchment paper. Combine all ingredients in a food processor and puree until mixture is mostly uniform and frothy in appearance with small nut chunks. Transfer to a quart-sized zipper-seal bag. Snip one corner and pipe into desired shapes, then sprinkle with sesame seeds.

Bake ~10 minutes or until golden brown and firm to the touch. [The cookies will harden as they cool.] Transfer paper with cookies to a cooling rack -- do not attempt to remove cookies until cool. If they're still flexible at that point, you can put them back in the [off]oven and the residual heat should dry them out.

Store in an air tight container.


Tuesday, November 17, 2009

What next?

The fall colors have fallen. I have to give the Yankees some credit -- it was quite pretty... and now I know that dry leaves on smooth brick sidewalks can be very slippery under foot or bike tire.

I just have to wonder: What happens next here in Yankee Land?

Wednesday, November 11, 2009

Peanut Butter Shortbread for Grandpa Ed

My paternal grandfather passed away recently. He was a great lover of peanut butter before his doctor cut it from his diet, so I've created a new peanut butter cookie recipe in his honor. I did a shortbread because he considered people over 5'5" to be abnormally tall.
He switched to refried bean and mustard sandwiches once the peanut butter was banned. I'm still working on how to turn that into a cookie.

Recipe: Peanut Butter Shortbread for Grandpa Ed

These actually hold together a little better if you use at least part wheat flour, but a few relatives will be avoiding gluten at the memorial, so I adapted. I like to use the grind-it-yourself peanut butter, it's nice and thick and the oil doesn't separate.

yield ~4 dozen

2 cups oat flour
1 cup powdered sugar
3/4 tsp baking soda
1/4 tsp salt
1/2 cup cocktail peanuts (or cashews)
1 cup natural peanut butter
1/2 cup butter (1 stick), browned or simply melted
1/4 cup amaretto
1/4 cup honey
1 tsp vanilla

[up to 4 Tbsp water, as needed]

Preheat oven to 350F.

Combine dry ingredients and nuts in a food processor and pulse until nuts are roughly chopped. Add all remaining ingredients and process until well-combined, stopping at least once to scrape down the sides of the bowl. Mixture may look crumbly but should cohere when pinched together -- add water a tablespoon at a time until it does.

Transfer dough to a mixing bowl. Pinch off walnut-sized pieces [cookie scoop #60] and place on a parchment-lined baking sheet. Use a small cut-glass vase or candy bowl to press the dough into a 1/8" disk, repeat until the sheet is full, then trim up the edges with an offset spatula or pizza cutter. [I obviously turned them into squares.]

Bake ~12 minutes or until cookies are golden brown.


Thursday, November 5, 2009

1 Year of Blogging

Today is the 1 year anniversary of my first post, the unintentionally anatomical pita bread.Maybe this year I'll get around sharing my weekly bread recipes. We'll see.

Tuesday, November 3, 2009

Pumpkin Risotto

Pumpkin risotto is an excellent use for one of those small pumpkins or winter squashes laying around everywhere right now... maybe even on your front porch. Each variety has a slightly different flavor, but they'll all work.In keeping with my "Components Matter" bent: Short-grain brown rice is much better in this recipe as it releases starches like the arborio rice does. It's usually the only type I keep in my pantry but I recently bought a popular long grain variety and now understand why so many people think brown rice is dry and unpleasantly healthy-tasting. I've found the Nishiki brand here in Yankee Land and back in Texas in the international aisle of the grocery store (Shaw's, Market Basket, and Fiesta) or in bulk at places like Whole Foods or Central Market.

Recipe: Pumpkin Risotto

You can roast the pumpkin at a higher heat if you're using a pressure cooker for the rice and want the gourd done faster, just be sure to check on it frequently so it doesn't burn. You could even use those tiny decorative gourds -- just slice in half and scoop the seeds -- but you may need more salt because they tend to be more bitter. Including the roasted skin gives a nice texture and extra fiber. Try it!

1 recipe, Brown Rice Risotto
1 small pumpkin or winter squash [2+ lbs]
spray oil
salt and pepper, to taste

Before you begin the risotto, preheat your oven to 350. [I used my toaster oven.]
Cut your pumpkin in half through the middle, scoop out the seeds, and quarter each half. Spray the chunks with a little cooking spray and sprinkle with salt and pepper.
Roast for about 45 minutes -- while you make the risotto -- until edges darken and the flesh doesn't yield any resistance when pokes with a fork. Set aside to cool until risotto is almost finished, then tear the chunks apart [I keep about half of the skins and discard the rest] and stir them into the rice at the very end and adjust the salt to taste.

Friday, October 30, 2009

Fantasmas Dulces [Ghost Sweets]

I first saw these on 101 Cookbooks, but I've since seen them so many other places that I don't know who deserves the credit. All I know is that they amuse me every time I make them.

Mine are flavored with HerbSaint, an absinthe clone from Louisiana that imparts a nice anise flavor often found in Mexican baked goods. I even used anise seed for the eyes; their tiny stems look like wild eyebrows... which, of course, doesn't make sense. Why would a ghost have eyebrows?

I included my recipe after the jump but you should use whatever meringue recipe works for you. Some people go nuts about meringue specifics, but I've found they're not that fussy if you use enough sugar.

Recipe: Fantasmas Dulces [Ghost Sweets]
You can swap vanilla or almond extract for the Herb Saint. I've also made these with black sesame seeds, silver dragoons, or mini chocolate chips for the eyes.

Yield: ~36 ghosts
3 egg whites (room temperature)
1/8 tsp salt
1/2 tsp Herb Saint or Pernod
1/2 cup granulated sugar
1/4 cup powdered sugar

anise seeds to garnish

Preheat oven to 225F. [Put your whites in your mixing bowl and leave them near the stove until they're room temp.] Line a baking sheet with parchment paper and fill a small bowl with anise seedsWhisk the two sugars together and set aside.

Add salt and liquor to whites. Using a whisk attachment, whip whites on low speed until foamy on top, ~1 minute. Increase speed to high and whip until soft peaks form, ~45 seconds. With the machine running, pour in sugar in a steady stream. Once mostly combined, stop the mixer, scrape down the sides of the bowl, and whip again on high speed until stiff peaks form, ~45 seconds more. Spoon into a pastry bag [without a tip] or a gallon ziploc [cut a corner off the bag when you're ready].

Pipe ghost shapes as 3 stacked mounds. [imperfections = personality] Use your finger to place the eyes. Bake 1 hour, turn oven off, and leave for another 1-3 hours or until stiff to the touch. If it humid, transfer immediately to an airtight container.


Wednesday, October 28, 2009

Texas Pecans

I was going to do a post on my goat milk caramels (cajetas) but I hit a little snag on the second batch that I can't quite explain and I don't want to give bad instructions.

Instead, let me say that Texas pecans are fantastic: big, buttery, and amazing when toasted and added to baked goods or eaten straight out of the shell. [Pecans, a member of the hickory family, are the only tree nuts or drupes native to the US.] There's even a bakery around the corner from me here in Yankee Land that boasts about its use of Texas pecans, so they must be the best, right? The harvest is just coming in and you can get them cracked in the shell now through the beginning of January.

Friday, October 23, 2009

Cocoa Powder: Go Dutch

Things are a bit pricier in Yankee Land. I tried to be frugal when I replenished my pantry upon arrival, but I've since reaffirmed that some things are worth the price when you're dedicated to food that tastes as good as possible.
Case in point: A few weeks into our adventure, JG made the comment that the biscotti we always have around weren't quite as good as they used to be. I knew they weren't and I knew why: store-brand cocoa powder. Dutched cocoa powder has a much stronger chocolate flavor [due to an acid neutralization process created by a Dutch man] and gives baked goodies a deeper color.
It's a few dollars more than Hershey's or store brand, but a bag or box lasts a while -- even for me -- and if you're going to use it as a primary ingredient to bind a cake together, it's better if it tastes great. I would even choose a cheaper Dutched cocoa over a premium non-alkalized cocoa.
So there.

Wednesday, October 21, 2009

Gluten-Free Chocolate Pesos

Today's JG's birthday, so I made a cupcake variant for his lab. At least one of the people in his group is the non-gluten type, so it seemed like a good time to practice GF-friendly baking. I considered one of the angel food variations, but ultimately decided to try something a little different.
[JG kindly supplied me with a photo in situ]

This is a take on a French tea cake called a financier because they resemble gold bars. They use ground nuts and usually some flour; once I ground almonds and substituted cocoa powder, I was just a tablespoon of cinnamon away from Mexican chocolate... then baking them in a mini muffin pan turned them into pesos.

I did this the first time like a chiffon and whipped the whites. I tried it again without whipping and the difference in rise wasn't too significant and I only got one piece of equipment dirty, so I'm posting the easy version with a variation for over-achievers.

Recipe: GF Chocolate Pesos
(or Mexican chocolate financiers)
Yield: 2 dozen mini muffin-sized coins [possibly one 9-inch cake layer?]
You don't have to brown the butter, but it's part of the classic financier preparation and adds a nice caramel-nutty note. If you want to whip the whites separately, transfer the rest of the mix to a big bowl after step 2. Whip whites, and incorporate 1/3 at a time.

1/2 cup roasted almonds (or ~1/3 cup almond meal)
1/2 cup dutch-process cocoa powder
3/4 cup sugar
1 tablespoon cinnamon
1/4 tsp salt
4 tablespoons butter, browned and cooled slightly
1 teaspoon vanilla
4 egg whites, room temp*

powdered sugar and/or sesame seeds to garnish

1. Preheat oven to 350F. [You can set the mixing bowl with egg whites near the oven to warm, just check to make sure it doesn’t get too hot.] Line the bottom of whatever pan you’ll use with parchment paper, or use muffin cups.
2. Process almonds with other dry ingredients until no large chunks remain ~30 seconds. Add butter and vanilla and pulse until crumbly and evenly moist.
3. Whisk whites with a fork until foamy. Add to chocolate and process until evenly batter-like.
4. Pour into prepared pan, filling almost to the top. [Optional: sprinkle with sesame seeds and a little sugar to form a crust.] Bake ~20 minutes or until a toothpick inserted comes out clean.
5. Cool until pan is no longer too hot to handle. Use a sharp knife to cut around the edges of the cakes and turn out. Dust with powdered sugar.


*I made mayo with leftover yolks:
4 yolks
2 tablespoons lemon juice or vinegar
1/2 tsp salt
1 cup neutral oil (canola or non-extra-virgin olive)

Slowly whisk oil into yolks/acid. Start with a few drops at a time and gradually increase to a steady stream. Once emulsified, adjust salt and add pepper to taste.


Saturday, October 17, 2009

My oven is calling you...

It was snowing yesterday morning here in Yankee Land.

While I waited for the bus (no snow-biking for me, thanks) it occurred to me that since I plan to keep my oven and stove on at all times to make my kitchen cozy, I should offer my recipe tweaking services to those who have recipes they only use for certain food festivities -- ones that could use a little updating but you don't make often enough to warrant the effort.

Personally, I've been thinking of recreating green bean casserole, but I just haven't done it... and last year's cherry pie experiments still need more work.

My kitchen and I are at your service.

Wednesday, October 14, 2009

Fat-Free Butterscotch Syrup?

Is that possible? Using real butter?

Yes. Yes, it is.

It's dipping into the warm drink zone here in Yankee Land. We have a particular favorite to coincide with the beginning of apple cider season: ButterBeer.


Yes, this is the name of a drink from the Harry Potter series. We first had it at an Alamo Drafthouse screening and the server described it at spiced cider, butterscotch syrup, and a shot of rum. [I imagine it's a take off of a Betty Crocker-type butter rum cider.] We've bought Monin syrup and made it that way, but I dislike ingredients called "butterscotch flavor." Real butterscotch sauce isn't hard to make, -- butter, brown sugar, cream -- and substituting water for heavy cream makes it a syrup instead of a sauce. I also happen to know a secret for taking the fat out of butter in a syrup base.

You ready?

Recipe: Butterscotch Syrup
yields~1 cup

1/4 c (4T) butter
1/2 c brown sugar
pinch of salt
1/2 c water
1/2 tsp vanilla

Melt butter until foamy with first hint of browning. [If it starts to smell burned, it is. Dump it and start over.] Whisk in sugar and stir occasionally until sugar dissolves and mixture is bubbly. Slowly pour in water while whisking continuously. The mixture will foam and sputter. Don't flinch.


Pour into a heatproof bowl or measuring cup (Pyrex is good) and stir in vanilla. Freeze until butterfat forms a solid layer on top. Scrape off the fat and store for another unwholesome purpose or discard. Let syrup come to room temp, if sugar is still grainy, bring to a boil again (nuke) until sugar dissolves completely. [It shouldn’t be, but these things sometimes happen.]

Bottle syrup and store in the refrigerator. [I have squeeze bottles, but you can reuse a [clean] honey or maple syrup bottle]

Thursday, October 8, 2009

Potato Salad Pizza

JG and I finally made this sweet potato & black bean salad and I will now be bringing it to any and all barbeques I attend. It's absolutely my type of potato salad, and we're now considering variations like yellow bell/white bean/mint.

The leftovers also make great pizza topping, just add sliced moz and minced garlic.

Monday, October 5, 2009

Whiskey Oatmeal Cookies

One more variation, then we move on to other fun things...
1 recipe Butter Rum Cookies with amendments and substitutions:
** Do not process oatmeal, mix all by hand or in standing mixer
** Use whiskey and amaretto for alcohol component

Fold in 1/2 cup prunes, chopped, or raisins. Bake as directed.

Thursday, October 1, 2009

Chocolate Sunflower Cookies

This variation was inspired by a bowl of chocolate/candy-covered sunflower seeds at a checkout counter. They were tasty -- so are these cookies. I pressed the seeds into both sides so the bottoms have a nice crunch. I considered arranging the seeds in a sunflower pattern, but the chocolate chunks made it too tricky and I was loathe to omit the chocolate.
Variation: Chocolate Sunflower Cookies
You can use a booze-free chocolate chip recipe if you're baking with children.

1 batch Butter Rum Cookies
~3/4 cup dark chocolate, roughly chopped, or a bag of chocolate chips
~ 3/4 cup roasted, salted sunflower seeds

Preheat oven to 375F. Fold chocolate into cookie dough. Roll or scoop into smaller-than-a-ping-pong-ball and drop into a bowl full of sunflower seeds. Press the dough into the seeds, flip, and press again. Transfer to a baking sheet and repeat with remaining dough. Bake 12-15 minutes or until the edges brown. [It takes 14 minutes in my oven.] Cool until chocolate resolidifies, then store in an airtight container.

Friday, September 25, 2009

[Low-fat] Butter Rum Cookies

Someone asked me what the point of a low-fat cookie was since I was still making -- and consuming -- sweets. The way I see it, 1) reducing/replacing the fat reduces the overall calorie count of the treat and 2) sugar calories are only "bad" if you don't burn them off* -- then they turn into fat -- whereas fat calories start off as fat and require extra effort to convert; like aerobic activity and reaching your target heart rate and whatnot. While I've come to enjoy lifting weights and spending time on the elliptical machine, I'd rather have a cookie that I can work off on my walk to the gym.
This new recipe, for example, still has all the sugar, but uses only 4 tablespoons of butter and 4 tablespoons of 80 proof alcohol (net: ~535 calories, some of which I think bake off with the alcohol, & ~45 grams of fat) versus 12 to 16 tablespoons of butter (~1,220 to 1,630 calories & ~135 to 180g fat) in a standard recipe. With another ~500 calories in flour and ~700 in sugar, they're still not "good" for you, but it's a pretty significant difference. At the rate I like to consume cookies [think Cookie Monster] there's no way I can keep ordinary cookies around the house and still be able to zip up my pants... and I like it when my pants fit... and I like keeping cookies around the house.
Enough ranting... This cookie is a riff on the pie crust method of using alcohol to hydrate the flour while inhibiting gluten formation, plus oat flour and powdered sugar/cornstarch for tenderness. Most of the alcohol does bake off, but a good ~30 -40% remains immediately after baking and slowly evaporates out over time, so this is probably not the best cookie for the kiddos [and the dough is downright boozy and eggless, making it an inappropriately excellent snack for adult dough-eaters]. These start off crunchy on the outside with a chewy caramel-flavored center and become uniformly soft over time. I've got a few variations in mind, but I'll test them first. So many cookies, so little time...
Recipe: Butter Rum Cookies
Yield: ~2 dozen cookies
Since there's so little, browning the butter is important for delivering the flavor of buttery goodness. These guys don't spread much during baking, though they will puff from the baking soda. You can use AP flour in place of the whole-wheat flours, and oat flour in place of the oatmeal. It may work using just 1.5 cups of AP, but I don't have any so I haven't tested it.

1/2 cup white whole wheat flour
1/2 cup whole wheat pastry flour
1/2 cup rolled oatmeal
1/2 cup powdered sugar (or white sugar plus 1 tsp cornstarch)
1/2 cup brown sugar
1/2 teaspoon salt
1/2 teaspoon baking powder
4 T butter, browned
2 T spiced rum
2 T vodka, everclear, or amaretto
2 t vanilla

Preheat oven to 375F. Combine all dry ingredients in a food processor [or blender**] and process ~3 minutes or until oats are mostly pulverized. Meanwhile heat butter in a small skillet over medium flame, stirring occasionally with a heat-proof spatula, until nutty brown milk solids rise through the foam, ~2 minutes. Remove from heat and scrape into a heat-safe bowl to stop further browning/burning.

Add alcohol and vanilla to the dry ingredients, then drizzle butter over. Pulse until mixture forms a cohesive ball. Scoop by rounded tablespoons (I used a #60 scoop) onto parchment lined sheet and flatten with a fork or glass [cut glass makes pretty patterns]. Bake 12-15 minutes or until edges are lightly browned. [Cookies may bee surprisingly flexible, but if they're browned, they're done.] Slide parchment onto cooling rack and allow to cool to room temperature. Store in an airtight container.

* My dentist may disagree.

**If using a blender, process dry ingredients, then transfer to a bowl and mix wet ingredients with hand mixer or spatula.

Perspective

There's a great quote in This Side of Paradise where the protagonist, a disillusioned and disaffected youth, walks along a country road and stops to examine a flower only to discover that the flower's not in the best shape either. He laments that nature is "a rather coarse phenomenon" that can only be enjoyed in macro and it, like the rest of society, doesn't hold up to close scrutiny.
This flower's at the end of its existence, but I think it more interesting in detail [click on the picture for better resolution].
I like scrappy.


FYI: I still have the mosquito box... They're still hatching and it's mesmerizing.

Wednesday, September 23, 2009

Now I've done it.

Have you ever accidentally created a mosquito terrarium? I don't mean a breeding ground in the form of a bucket of rain water on the patio; I mean a display case in your living room full of buzzing mosquitoes, something only a truly demented person would possess.
It started innocently enough. There was a very pretty polypore fungus at the base of a tree around the corner, hanging over the curb. I decided that sooner or later a car was going to park too close and destroy it and my Wardian case happened to be empty, so JG brought it home for me. [You know it's love when they bring you a fungus the length of your forearm that smells of wood rot.]
Unfortunately, it turns out that the polypore holds enough moisture to spawn mosquitoes and now there are quite a few floating around the case but, luckily for me, New England mosquitoes are frighteningly large and don't seem to be able to escape at the hinge seams.

My only hope now is that whatever spider lives in there will eat them all.

Monday, September 21, 2009

New England Still Life

A friend brought me produce she picked at a local farm... Somehow apples, peaches, plums, and pears all ripen at the same time up here... I don't quite understand it, but I've enjoyed eating it.

Wednesday, September 16, 2009

Sticky Crab Apple Meringues

My shortbread experiment needs more work, so in the interim I thought I'd share another crab apple failure. The New York Times had a recipe for a walnut meringue with caramelized apple and still I had some quartered and seeded crab apples in the fridge that needed to go.
I also have fond memories of a nutty meringues my grandmother used to make with pecans -- although that may only have been when she was visiting us since Iowa has lots of black walnuts -- and the addition of herbs and alcohol made it seem like the sort of recipe I was meant to make.
But then a mild cold front came in, and my meringues got sticky. I tried rebaking them, which never looks pretty but can work texturally, but the net result just wasn't exciting. The caramel crabapples were still very tart and didn't meld with the nutty meringue at all... I think it was a pretty solid fail, but I blame myself, not the newspaper.
I'll encourage JG to post his opinion, since we don't always agree on these things.

Tuesday, September 15, 2009

Crab Apple Preserves

JG and I were at a wedding in New Hampshire recently and came across a crabapple tree in a park. There was fruit all over the ground and the tree was chock full of fruit still, so we emptied a shopping bag and filled it full of fruit (~4 lbs). I'd never done anything with crab apples before, but we quickly discovered they're extremely tart like cranberries but with a heady apple scent, which took us into thanksgiving-style thinking. The idea was to preserve them in a spicy syrup for serving after turkey, but I was wholly unable to keep the skins from splitting during the simmer, no matter how many ways I pricked them.
Luckily, as super potent apple, they also have a very high pectin content, so I sieved the whole mess and turned it into some wildly-colored preserves that we can serve in lieu of cranberry sauce this year... unless I happen upon a wild cranberry bog up here, then we may have to have both.
How do you know that weird little fruit is a crabapple? Cut it in half; it should have a 5-star seed pattern. If it doesn't, I don't know what it is and you probably shouldn't put it in your mouth.
I attempted to make crabapple jam squares, but they went horribly awry in snack-cake kind of way. Tasty, but not what I wanted to send to my grandfather.
I think I came up with a solution today, but more experiments are required...


Recipe: Crab Apple Preserves
What I made was an amalgamation of a few failures, but this way will work the first time around.

~2 1/2 cups sugar
2 cups water
1/2 stick cinnamon
6 black peppercorns
3 cardamom pods
1 alspice berry
1/4 tsp anise seed
1 lemon, juice and zest (or an orange, for a little less zip)

~ 2 lbs crab apples, whole

Use 1 1/4 cup sugar for every 1 lb of crab apples. Combine spices in a diffusing ball or tea bag. Bring sugar, water, citrus, and spices to a boil and simmer in a small stockpot or dutch oven, uncovered, for 15 minutes. Remove spices with a slotted spoon and discard. Add crab apples and simmer gently for 15 minutes. [Congratulations if your skins don't split.] Set up a strainer over a big bowl, pour the contents of the pot through, and press the solids until only the skins, stems, and cores remain -- the cores are much tougher than a normal apple. Return the contents of the bowl to the pot over medium heat and stir frequently until the preserves hit 220F (they'll foam up and come close to boiling over at about 218F). Pour into hot jars and seal. Process in a water bath, if desired.